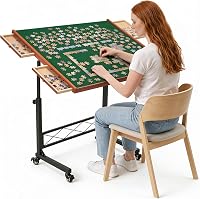
How to Make a Tilting Puzzle Table
Build a flat board on a base frame, join them with a hinge at the back edge, and prop the board at the angle you want. Add a raised lip or rail at the low edge so pieces stay put, and brace or lock the prop so the table holds that tilt.
On this page (9 sections)
- What do you need before you start a tilting puzzle table build?
- How do you build the flat board and base frame?
- How do you set up the tilt and keep it steady?
- How do you keep pieces from sliding off a tilted board?
- How do you make the table safe and comfortable to use?
- Can you add tilt to an existing puzzle table?
- Should you build one or buy a ready-made tilting board?
- How do you care for a homemade tilting table?
- What is the best way to make a tilting puzzle table?
The short answer to how to make a tilting puzzle table is to start with a flat board and a base frame, join them with a hinge along the back edge, and prop the board at the angle you want. Then fit a raised lip at the low edge so pieces stay on the surface, and brace the prop so the tilt holds.
You don't need a workshop full of tools. A sheet of 3/4 inch plywood or MDF, two hinges, a folding easel stand or a notched prop, some wood screws and a strip for the lip cover most of the build.
The rest is measuring carefully and checking that the frame sits flat before you fix anything down.
What do you need before you start a tilting puzzle table build?
Gather the board, base frame timber, hinges, a prop and a lip strip first, then cut everything to size on a flat floor. Having the parts ready means you can dry-fit the tilt before any screws go in.
The top board should be large enough for the puzzle size you usually build. A 1,000 piece puzzle needs roughly 30 by 22 inches of working surface, while a 1,500 piece puzzle needs closer to 35 by 24 inches.
Add a little margin so the border isn't pressed against the lip.
For the base, use straight timber that won't bow. Two side rails and two end rails make a simple rectangle, and cross-braces stop it racking when the board is raised.
Choose a hinge with a leaf wide enough to screw firmly into both the base rail and the underside of the board.
You'll also want a surface covering with some grip. Flannel, felt or a textured cloth holds pieces better than bare wood when the board tilts.
Cut it slightly larger than the board and wrap it around the edges before fixing the lip.
How do you build the flat board and base frame?
Cut the top board and the base rails to size, then assemble the base as a square frame. Check the diagonals match before fixing, because a frame that is out of square will make the board rock when it tilts.
Step 1: Cut and check the top board
Measure your largest puzzle and add 2 inches on each side. Mark and cut the board, then sand the edges and face so pieces slide without snagging.
A warped top will never sit steady on a hinged frame, so swap it for a flatter sheet if it rocks.
Step 2: Build the base frame
Cut two side rails and two end rails from straight timber. Butt-joint them into a rectangle and fix with wood screws or glue and screws.
Measure both diagonals and adjust until they match, then add one or two cross-braces across the middle to keep the frame rigid and to give the prop something to rest against.
Step 3: Fit the hinge at the back edge
Place the board on the base and line up the back edges. Mark the hinge positions about a quarter of the way in from each corner.
Screw one leaf to the back base rail and the other to the underside of the board, then open and close the hinge a few times to confirm the board swings up cleanly without binding.
How do you set up the tilt and keep it steady?
Use a folding easel stand or a notched prop under the board, and lock it at the angle you want. A prop with several notch positions lets you raise the board in steps until your neck feels comfortable.
A simple approach is a wooden prop that hinges to the base and slots into a notch strip fixed under the board. Cut three or four notches so you have a low, medium and steep setting.
A folding easel stand works the same way and folds flat for storage.
Check the prop sits on a wide base and can't slide sideways. If the prop is narrow, add a small block or bracket to cage it in place.
Test the tilt with an empty board first, then with a few puzzle pieces to see how they behave. Start at the lowest notch and raise it only as far as you need, since the steeper the angle, the more the pieces want to slide.
How do you keep pieces from sliding off a tilted board?
Fit a raised lip along the low edge and cover the surface with a grip material. Together they hold the bottom row of pieces and stop loose ones from slipping down the board.
Cut a strip of timber about 1 inch tall and the width of the board. Fix it along the bottom edge with glue and screws from underneath, so the top face stays smooth.
Sand the inside edge so pieces don't catch on it.
Wrap the board in flannel or felt before fitting the lip. Pull the cloth tight and staple it underneath, then trim the excess.
The lip covers the raw edge and gives the cloth a clean finish. Keep the top edge open so you can still reach the far side of the puzzle.
How do you make the table safe and comfortable to use?
Round the corners, sand every edge and keep the tilt within a comfortable range. A safe build is one you can reach across without stretching and one that doesn't tip when you lean on it.
Sand all exposed edges and corners until they are smooth. Check the base frame doesn't have screws poking through, and countersink any that sit close to the surface.
Set the table on a level floor and shim or trim the high corner if it wobbles, since a rocking table makes the tilt feel unstable even when the prop is locked.
Keep the angle modest for long sessions. If your neck or back aches, lower the board and take a break.
For more ideas on comfort and lighting, our guide to puzzle tables for adults covers setups that suit frequent puzzlers.
Can you add tilt to an existing puzzle table?
Yes. Lift the board off its frame, add a hinge along the back edge and fit a folding prop or easel bracket.
This is the quickest way to convert a flat table without building a new base.
Check the existing frame is square and rigid first. If it flexes, add a brace before you hinge the board, or the whole table will twist when you raise it.
Remove any fittings that stop the board lifting, then line up the hinge as you would on a new build and test the angle with the board empty.
If your table already has drawers, keep them in the base and hinge only the top. Read how to make a puzzle table with drawers before you cut, so the drawer boxes stay clear of the hinge and prop.
Should you build one or buy a ready-made tilting board?
Build one if you want a custom size or already have a flat table to convert; buy one if you want the tilt, storage and cover sorted in a single unit. A ready-made board saves the cutting and hinging work and often adds drawers and a cover.
If you decide to buy, the ALL4JIG 1000 Tilt and Rotate Board combines 360 degree rotation with an adjustable tilt. Its four sliding drawers keep pieces sorted, and the Oxford cloth surface is made to hold pieces when the board is angled.
The Lavievert 1500 Tilting Board with Wooden Cover gives you five angle settings up to 30 degrees and a wooden cover that keeps dust off an unfinished puzzle. Its flannel top is there to stop pieces sliding when it's tilted.
For smaller puzzles, the Lavievert 1000 Tilting Board with Wooden Cover uses the same five-angle design in a 31.1 by 21.26 inch size. It's the lighter option if you move the board between rooms.
If you want to roll the table away between sessions rather than carry it, compare the options in our guide to the best puzzle table on wheels. For a wider look at tilt and rotation, see our roundup of the best tilting puzzle tables with legs.
How do you care for a homemade tilting table?
Wipe the surface, tighten the hinge and check the prop and lip before each long session. A few minutes of upkeep keeps the tilt steady and the surface free of dust that makes pieces slide.
Brush or vacuum the cloth surface to remove dust and crumbs. Spot-clean with a damp cloth and let it dry fully before folding the board down.
Check the hinge screws now and then, since vibration from raising and lowering the board can loosen them. Look at the prop and lip for cracks or wobble and replace a split prop rather than gluing it, because the prop carries the weight of the raised board.
What is the best way to make a tilting puzzle table?
The best way to make a tilting puzzle table is to keep the build simple: a flat top, a square base, a hinge at the back edge and a prop that locks the angle you like. Add a lip and a grip surface so pieces stay in place, and check the whole table sits flat before you use it.
Build your own if you want a custom size or you're converting a table you already own. Buy a ready-made board if you want the tilt, drawers and cover without the cutting and hinging.
Either way, set the angle low to start and raise it only as far as your neck and shoulders need.
Frequently asked questions
What angle should a tilting puzzle table be set at?
Most people find 15 to 30 degrees comfortable for reaching the top of a large puzzle without leaning over it. Start low and raise it a notch at a time until your neck and shoulders feel relaxed, then lock or brace the prop so it cannot slip back down.
How much weight can a homemade tilting table hold?
It depends on the board, the hinge and the prop you choose. A 3/4 inch plywood top on a braced frame handles a full 1,000 or 1,500 piece puzzle with room to spare, but keep the prop load on a wide base and fix the hinge with screws long enough to bite.
Do you need drawers in a tilting puzzle table?
No, but drawers keep loose pieces sorted and stop them sliding around when the table is tilted. If you want storage as well, plan the drawer boxes into the base frame and read our guide on how to make a puzzle table with drawers before you cut wood.
What is the simplest way to make a table tilt?
The simplest method is a hinge at the back edge and a folding easel stand or prop that notches into the base. It takes two hinges, a prop and a raised lip, and it lets the board lie flat when you are not using it.